Buy Consultant Access
$250/yearly
How do I Use Consultant Access?
First, pay for it by clicking on “Buy Consultant Access” at the top of this page. Once your payment clears, just as with our testcode purchase process, PayPal notifies our website and the website updates your user profile immediately. If you already have an active Consultant Access subscription, your expiration date will be bumped by a year. If you've had a Consultant Access subscription before, but it is expired, then your consultant access will be valid for a year after the date you purchase it. If you haven't had Consultant Acccess before, then your new subscription will be valid for a year after the date you purchase it. The expiration date is shown in your account page, below your name.
If your consultant access expires within 3 days (or is already expired), the date will be shown in bold, red text. If your consultant access will expire within the next 30 days, the date will be shown in bold yellow text on a light gray background. This is your warning to renew your access before it expires.

After your purchase is verified and your Consultant Access is in place, you can click on "+ New Group" in the new Consultant Access section in your account page to create a new group.

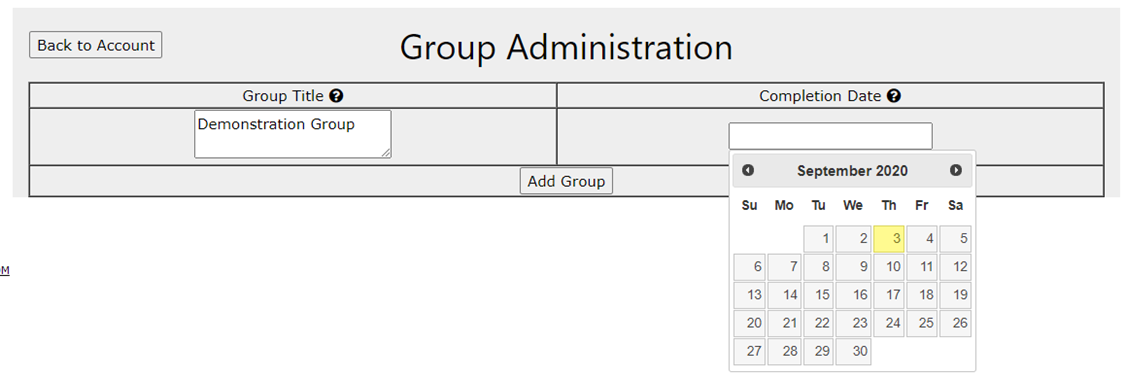
You'll specify a group title, and choose an expiration date as to when the group is expected to complete, and then click "Add Group" . Choosing a date before today will only create an empty group that you cannot edit, so be sure to choose a date after today.

You'll be redirected to the group you've just created, and there, you'll be able to enter a group attendee's first name, last name, email address, and choose from a list of un-allocated testcodes.

Finally, click "Add Attendee" and that attendee's account will be created. By default, if a user's account does not exist yet, it will be assigned a password that's the same as the initially assigned testcode. You cannot add an attendee without assigning a testcode, and you must specify a valid value for each of the first name, last name, and email address.
You should note as well that while viewing a group, you can also update the group title and/or completion date, and then click the ‘update’ button to change those values.
If a user's account already exists, you'll be shown "Already Exists" under the Password column. Otherwise, the password field will show "Same As Testcode". Users for whom the password shows “Already Exists” will need to either remember their password, or use the “Reset Password” functionality on the login page.
Please be aware that the Group cannot be edited (ie you cannot change the title, completion date, or add/remove attendees) after 00:01am, the morning of the completion date that you specify. If you wish to accommodate "last minute" attendees, you may wish to specify a completion date one day after your actual completion date to allow for this.

You will need to provide login details to each attendee (email address and password), so they will have login details. We suggest that for users who show “Already Exists” as the password, that you tell them to use their existing account, or, use the “Reset Password” functionality. You may need to remind them to check their spam folder.
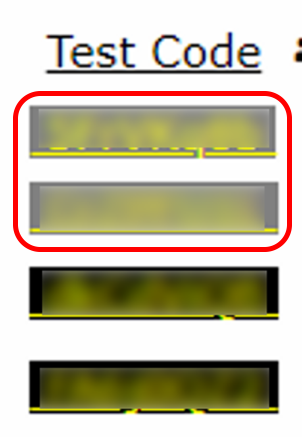
Testcodes that are assigned to someone within a group will show up with a gray background in your account, rather than black, so you know that they’ve been assigned, without having to search through all of your groups.

When an attendee logs in, they will see, in their account, an assigned testcode waiting for them. They only have to click on that testcode, in order to begin their test.
Group Attendees must complete their test
before the completion date you specified for the group, as the link will disappear at 00:01am the morning of the specified completion date, and their assigned testcode will be released back into the pool of available testcodes.

How do I Add a Consultant?
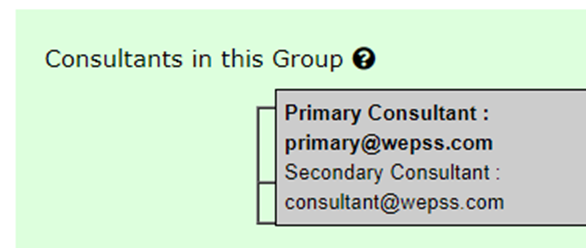
All consultants in a consultant group can view a list of who’s in the group by hovering over the black circle with question mark in it. The person who pays for the access is in bold:

To add or remove users from your consultant group, click on the title of that section in your account page:

On the “Consultant Access” page, you can key an email address and click “Add” to add them:

Please note that the user in question must have an account at wepss.com – if they are unfamiliar with how to do that, direct them to go to the login page and click on “Register for a free account” at the bottom, and read and follow all instructions.
If you try to add a user who does not have an account, the page will briefly display “That user was not found, please try again.” You will be taken back to the prior page where you can try adding the user again. If the user is found, the page will briefly display, “User Found! Adding them to your consultant access.” You will be redirected back to the page, but now you will see the newly added user:

To remove a user from your Consultant Access, simply click the “Delete” button on the right-hand side, next to their email address.
Is there Anything Else?
Yes! We have also incorporated a new method of downloading results. While this is available to everyone in a basic sense, those who have purchased consultant access will see additional details.
When you click on the download buttons:

You will get a download of testcodes, used or unused per which button you use (note, non-consultant access users won't have access to the Consultant Access areas) but those who have not purchased consultant access will see:

However, if you pay for consultant access, you see a lot more information!

If you have questions or comments, you are always encouraged to reach out to us on our
Contact Form.


